

Beeswax wraps are a fantastic natural and eco-friendly method of keeping your food fresh. With the right mix of beeswax, jojoba oil and resin, you’ll have a versatile kitchen wrap with enough tack to grab onto itself, as clingfilm does, and cover large dishes of food.
There has never been a better time to transition away from plastic kitchen wraps and storage bags. We know that plastics take centuries to decompose and, as they do, will degrade into countless microplastics, contaminating our food supply and waterways, and therefore our bodies. Heat causes soft plastics to degrade quickly and this is especially concerning, given that clingfilm is often used to cover hot dishes and could be leaching into our food.
Plastics contain hormone-disrupting chemicals which, if allowed to accumulate in the bloodstream, can wreak havoc on human health. Hormones are our master regulators, instrumental in our bodies’ most vital functions – we need our hormones in perfect balance for optimum health.
Beeswax wraps are the perfect alternative to plastic clingwrap, to reduce your household waste, prolong the life of fresh foods and safeguard your health. All ingredients are found in nature, making them compostable, and perfectly safe for people and the environment.
While there are a lot of gorgeous done-for-you beeswax wraps out there, like my personal faves from The Beeswax Co, there are three terrific benefits to making your own. Working with your hands to create something from scratch is medicine for the soul. I always find it so personally fulfilling to get the knack of a new skill and become more self-sufficient.
In choosing to DIY, you can customise the size of your beeswax wraps to the dishes and containers that you have at home and choose colours and styles of fabric that you love. Many beeswax wrap brands are made using organic cotton, which we highly recommend, because conventional cotton is grown and processed using toxic agrichemicals and you don’t want that hot mess near your food.
And finally, making your own beeswax wraps is more cost effective than buying individual wraps. One bar of pre-blended beeswax will make 4-8 wraps and you can source discounted fabric ends to bring the cost down further. Most other tools required for the project will be items that you already have at home.
I’m going to walk you through the simple process, step by step, so that you can create DIY beeswax wraps that you’ll be proud of and will use time and again.
What you’ll need:
- A pre-mixed block of beeswax, oil and resin, like this one from Sustomi. Working with these ingredients separately can be fiddly and time-consuming, while beeswax alone, or different types of resin, can result in a less malleable and grippy wrap. The Sustomi block is super easy to work with and takes the guesswork out of the ingredients and quantities required.
- Clean, preferably organic cotton fabric in good condition.
- Sharp pinking shears to cut your fabric to the desired size, without fraying the edges.
- A cheese grater to grate the wax block (use the side with the largest holes).
- A large baking tray lined with baking paper. If you’d prefer not to use baking paper, use a baking tray that you don’t mind keeping aside especially for wrap-making, or a ceramic or glass dish that will be easier to remove the wax residue from.
- Kitchen tongs
- A clean paintbrush, basting brush or similar
- A portable clothesline that you can sit in the shade.
Method:
Now you’ve got your equipment sorted, let’s do this thing!
- Grate your Sustomi block into pellets – short, sharp bursts on the grater works best.
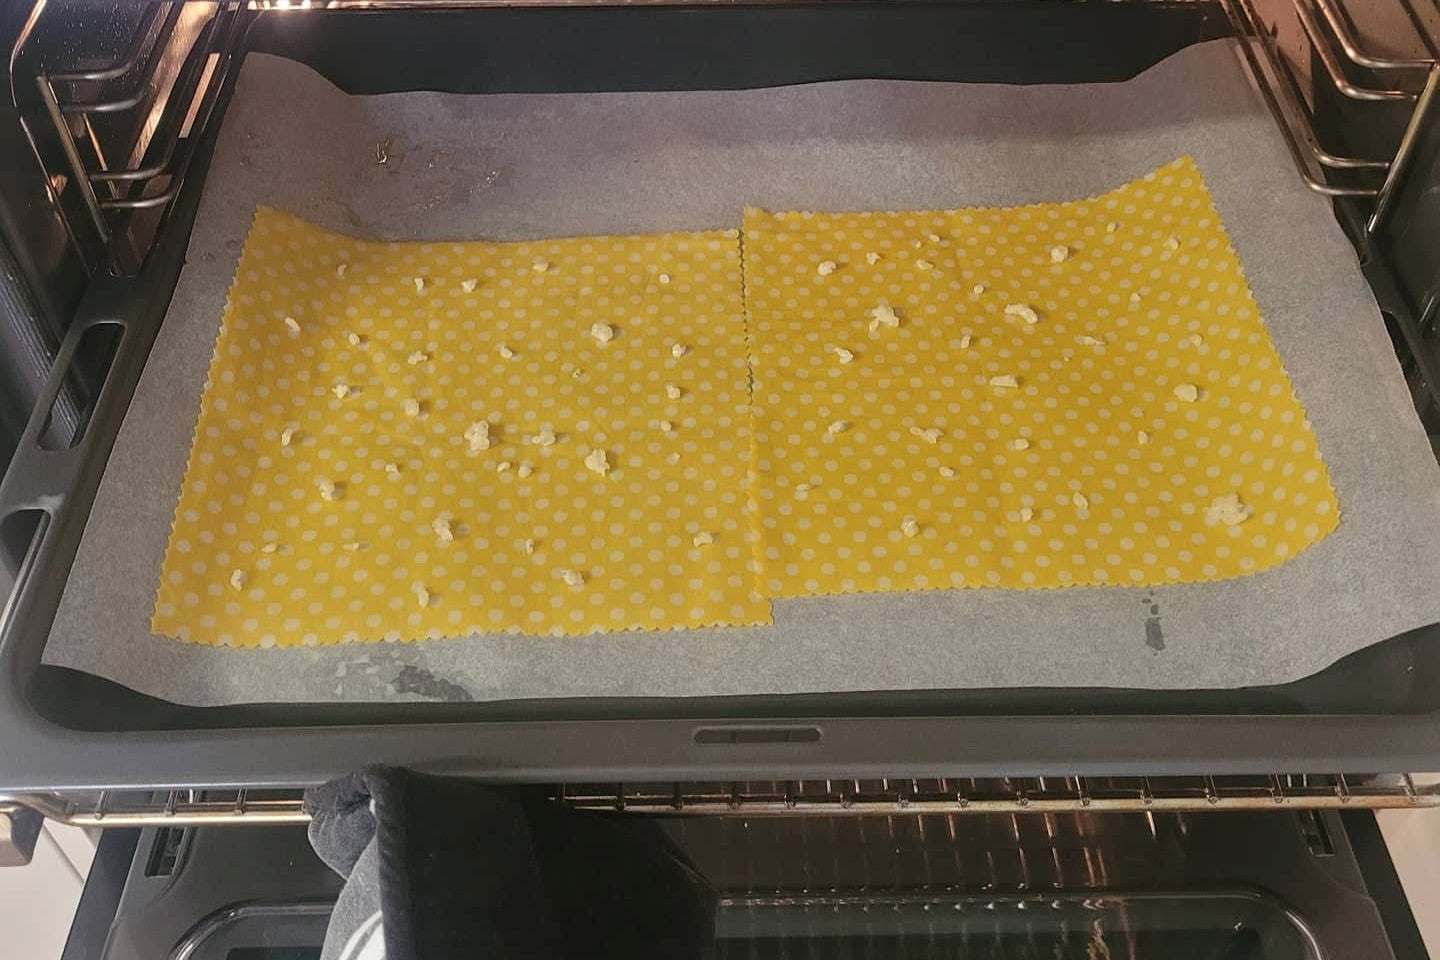
- Lay your fabric on baking paper and cover fabric in wax pellets (about 0.5 - 1cm apart).
- Place tray in oven at 107 degrees Celsius or 225 Fahrenheit for a few minutes, until wax melts completely.
- With tray still in oven, use your brush to evenly distribute wax over fabric.
- Remove tray from oven and use tongs to pick up fabric by the corner. Allow to cool for a few seconds.
- You will now be able to hold the top corners in your fingers and hang wrap on your washing line to cure.
- If you’ve used a glass or ceramic dish, scrape off as much hardened wax as you can, pour boiling water over the dish to soften remaining wax, then wash as usual.
How to use your beeswax wraps
As soon as your wraps have dried, they will be ready to use. The wraps will become more pliable in response to the warmth of your hands. Hold the wrap together for a few seconds and it will develop some stick and easily mould to any shape of food or container you’d like to wrap.
Beeswax wraps are perfect for wrapping or covering any type of food, bowl or dish imaginable, but we don’t recommend using them on very hot dishes or in contact with meat. Covering meat with your wraps would mean that they need a hot water wash, in the interests of food safety, and hot water is a no go when cleaning your wraps.
How to look after your beeswax wraps
After each use, wipe your beeswax wraps on both sides, using cool to luke warm water and a mild detergent, before rinsing. Avoid rubbing vigorously, using an abrasive sponge, soaking in water or washing in hot water, as this will cause the beeswax to deteriorate more quickly. If your used wraps are free of food residue, a simple rinse will suffice. Once clean, leave wraps to drip dry over the dish rack.
When your beeswax wraps are dry, fold each one onto itself, to prevent wax from drying out and store them in a drawer.
Never use your wraps in the oven, microwave or dishwasher as this will melt the wax and the wraps won’t be as effective.
How to dispose of old beeswax wraps
When properly cared for, your beeswax wraps will last a year or more, after which they can be rewaxed with a new block of pre-blended beeswax, oil and resin. Once the fabric becomes tatty, though, this will become difficult, after which time you can cut your wrap into strips and use as fire starters or simply pop your well-used wraps into the compost bin or bury them in your garden.
Happy Wrapping!